In order to help you choose the best frame, we have developed a unique frame configurator.
In addition to the configuration of numerous options, the system allows you to have a graphic preview not only of the frame, but also of the setting in which the frame will be placed.
This functionality will allow you to see the final result of your frame, without having to imagine it.
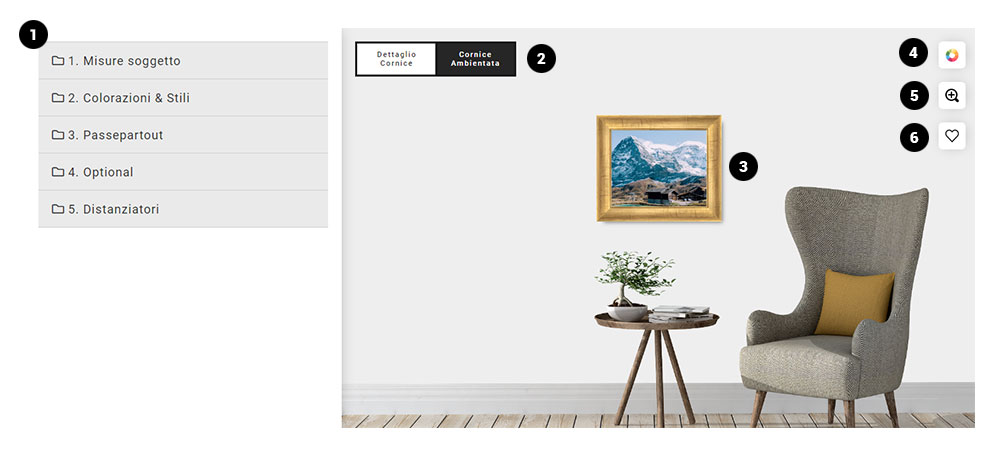
1) Configuration panel
In this section you can define the size, style and options you want for your frame. The panel is structured on 5 levels:
1. Subject measurements : in this section you enter the
exact measurements of our subject. In order to take the correct measurements, we recommend that you consult the page on
how to take measurements of the subject to be framed.
In addition, to allow us to optimise your frame, we ask you to indicate the thickness and type of subject.
You can also upload a preview image to see the final result or choose one from our archive of sample images.
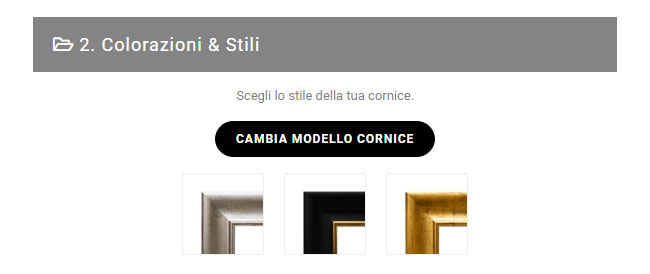
 2. Colours & Styles
 : in this section you can see the different colours (of the same frame model) and alternatives related to the product.
If you want to change the model and choose a new type of frame just click on the button "change frame model".
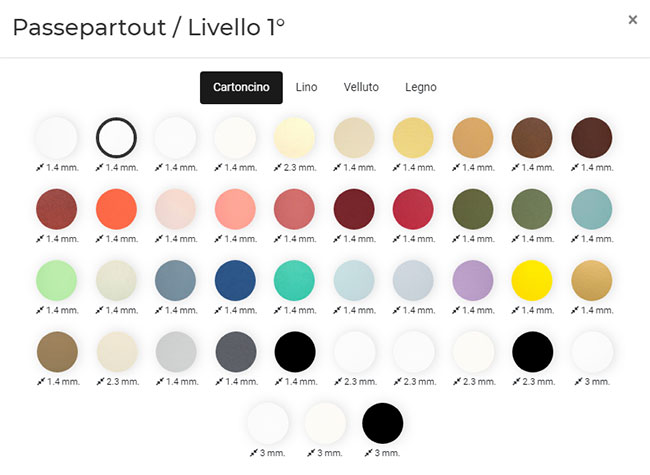
 3. Passepartout
 : To further enhance your subject you can add one or more passepartouts.
You can insert up to 3 layers of passepartouts on top of each other and for each layer set the visibility size.
You can choose between different types of passepartouts: cardboard, velvet, linen and wood.
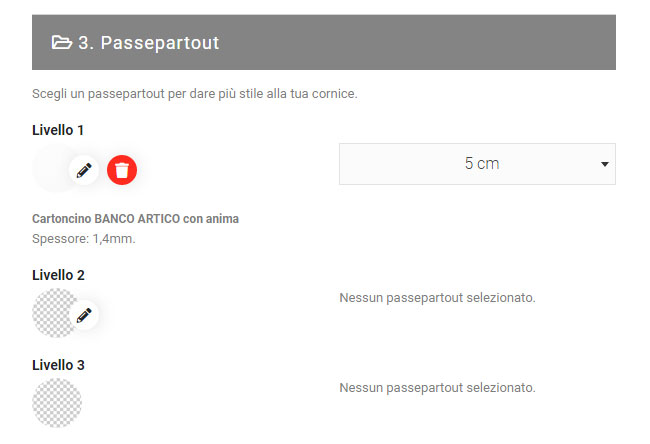
Click on the pencil icon to choose the type and colour of the passepartout.
Clicking on the recycle bin will delete the passepartout layer
The size selector indicates the visible width of the passepartout.
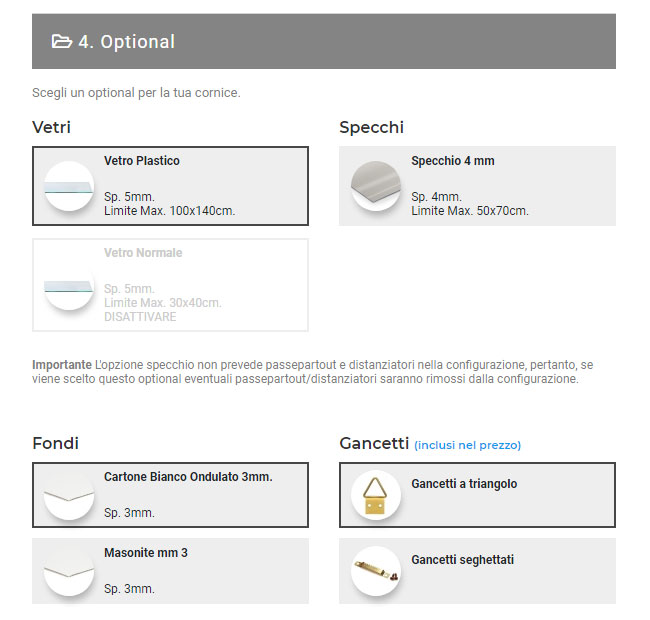
4. Optional : here you can choose a cover from the different types of glass and mirrors available
You can also choose a bottom or back panel from the different closing materials and your preferred hook system (triangle / serrated).
Please note that the hooks are mounted on both sides, so you can hang the frame both vertically and horizontally.
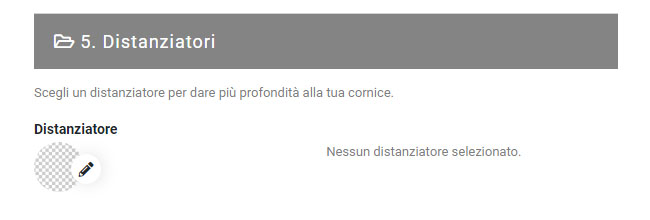
 5. Spacers
 : To give more depth to your subject you can set a spacer.
That is a profile (made of wood or coloured cardboard) around the perimeter of the frame.
Depending on the type of spacer you can decide how to place it on the glass if there is one.
The only limitation is for cardboard spacers that require a glass and can only be placed "under glass".
2) Preview area
The main feature of our configurator is the possibility to see the preview of the frame set on different customisable layouts.
You can then switch between a set view and a detailed view of the frame.
3) The frame
Depending on the various settings that can be configured, the preview of the frame changes dynamically in proportion to the chosen setting.
It is also possible to drag the image to the desired point.
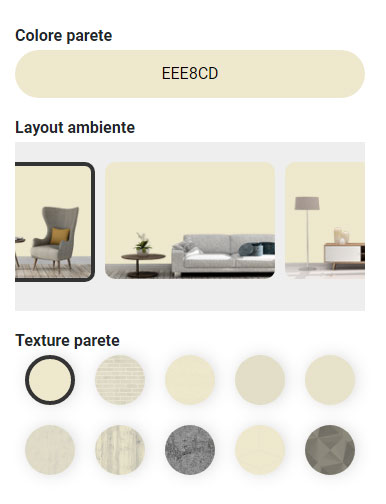
4) Layout
By clicking on this icon you can activate the setting menu.
As already mentioned our frame can be inserted into different types of rooms and customisable settings.
You can set a wall colour, choose the layout of the room and add a texture with different effects.
This way you can graphically recreate a room similar to where the frame will be placed and preview the result.
5) Zoom
Clicking on this icon switches to the frame detail view, where the preview area is entirely occupied by the frame with a larger display.
6) Add to favourites
Each frame configuration can be added to your favourite products and loaded at any time as a starting point.
This can be useful if you are undecided about certain types of frames and want to have them already stored for later review.
In addition, products added to your favourites list can be loaded into the FRAME WALL.
What is the FRAME WALL? The FRAME WALL is a multiple frame viewer. With this tool you can load different frame configurations and place them on different settings.
You can then create a virtual wall and preview the final result without having to use complicated photo-editing software.
Want to see how it works?
Find out more about our FRAME WALL.
 Spain
Spain
 France
 Germany
 Belgium
 Luxembourg
 Netherlands
 Austria
 Italian
  English